The Wyckoff Method
Complete guide to learn how to read the market: identify accumulation, distribution and the footprint of institutional money. Step by step and from scratch.

Ruben Villahermosa
Trader and educator
The Wyckoff Method is a technical analysis methodology developed by Richard Wyckoff in the early 20th century. It is based on three fundamental laws: Supply and Demand, Cause and Effect, and Effort vs Result. It allows identifying the activity of 'smart money' (institutions) through the study of accumulation and distribution structures, helping traders anticipate market movements.
Wyckoff theory was developed by Richard D. Wyckoff, a Wall Street trader and the founder of the financial magazine Ticker. The Wyckoff Methodology is designed to help traders identify market entry and exit points, as well as better understand price dynamics.
Table of Contents
What is the Wyckoff Method?
The Wyckoff Method is a technical analysis approach for trading the financial markets based on the study of supply and demand; that is, the continuous interaction between buyers and sellers.
As you probably already know, the odds of winning are stacked against you. Financial markets are controlled by large, well-informed operators, and if you want a chance you must try to trade alongside them rather than against them.
The premise is simple: when well-informed operators want to buy or sell, they carry out processes that leave their footprints on the chart through price and volume.
The Wyckoff Methodology seeks to identify that professional intervention in order to work out who is most likely in control of the market and to enable us to lay out sound scenarios of where price is most likely headed, that is, to position ourselves alongside them.
In the financial markets, knowing what the large operator is likely doing is fundamental. Basically because they are the ones who either handle privileged information; or carry out research that allows them to make more objective valuations; or simply because they have the ability to make the path of least resistance be up or down.
That is why we want to know what they are doing and we want to position ourselves in their same direction. This means that if the footprints we can extract from chart analysis suggest they may be buying, we will want to buy with them; and if we determine that they are most likely selling, we will sell with them.
Who was Richard Wyckoff?
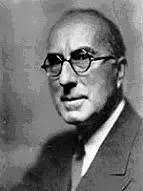
Richard D. Wyckoff
1873 - 1934
Richard Demille Wyckoff (1873 – 1934) became a Wall Street celebrity. He was ahead of his time in the world of investing, as he started as a stockbroker at age 15, and by 25 he already owned his own financial brokerage firm.
The method of technical analysis and speculation he developed arose thanks to his observation and communication skills. While working as a broker, Wyckoff saw the game of the large operators and began to observe, through the tape and the charts, the manipulations they carried out and from which they obtained high profits.
"He stated that it was possible to judge the future course of the market by its own actions, since price action reflects the plans and purposes of those who dominated it."
Wyckoff applied his investing methods achieving high returns. As time went by, his altruism grew until he redirected his attention and passion to education.
Wyckoff's educational legacy
In 1931, Wyckoff founded the Stock Market Institute in New York, where he personally taught small groups of students. His pedagogical approach was revolutionary for the time: instead of selling signals or magic systems, he taught his students to think like the large institutional operators.
For years, Wyckoff published "The Magazine of Wall Street", one of the most influential financial publications of its time. In it, he not only analyzed the markets but also educated thousands of readers about the true mechanisms that moved prices. His mission was clear: to democratize knowledge that until then was reserved only for the most privileged circles of Wall Street.
What makes Wyckoff's legacy unique is that his teachings have withstood the test of time. More than 100 years after their development, the fundamental principles remain just as valid. Modern markets operate with high-frequency technology and complex algorithms, but the underlying dynamics of institutional supply and demand remain intact. The large funds, investment banks and market makers still leave the same footprints that Wyckoff identified in the 1920s.
Why Wyckoff is still relevant today
While many technical analysis methods have become obsolete or lost effectiveness with the technological changes in the market, the Wyckoff Method remains valid because it analyzes human behavior and institutional psychology, not superficial patterns. Algorithms and high-frequency trading have not changed the need to accumulate before going up or distribute before going down; they have simply made these processes faster and more sophisticated.
Historical lineage: from Wyckoff to modern methodologies
Most modern institutional trading methodologies —Volume Spread Analysis, Volume Profile, Order Flow, Smart Money Concepts, Candle Range Theory— are direct descendants of Wyckoff's work. Knowing this lineage lets you understand why so many seemingly different approaches lead to the same operational conclusions: they all analyze the institutional footprint, only the tool changes.
| Era | Author / Methodology | Key contribution | Wyckoff heritage |
|---|---|---|---|
| 1908-1934 | Richard D. Wyckoff | 3 laws, market cycle, Composite Operator, characteristic events | Origin |
| 1951-1967 | Robert Evans · Stock Market Institute | Led the Wyckoff Stock Market Institute. Systematized the 9 buying/selling tests and developed Point & Figure for target projection. Coined iconic analogies still used today: Jump Across the Creek, Back-up and Fall Through the Ice. | Direct continuator |
| 1990s-2010s | Tom Williams · Anna Coulling · Gary Dayton · David Weis | Modern systematization of price-volume reading: Master the Markets (Williams, 1993), A Complete Guide to VPA (Coulling, 2013), Trades About to Happen + Weis Wave (Weis, 2013), Trade Mindfully (Dayton, 2014). | VSA and Volume Price Analysis |
| 2007-present | Hank Pruden · Bruce Fraser · Roman Bogomazov | Academic systematization of the method. Pruden formalized it at Golden Gate University (Three Skills of Top Trading, 2007). Fraser and Bogomazov continue the legacy via Wyckoff Analytics and the Wyckoff section of StockCharts. | Academic Wyckoff |
| 2018-present | Ruben Villahermosa | Dynamic Wyckoff adaptable to modern markets: substance (institutional logic) over form (rigid labels). Integration with Volume Profile and Order Flow to validate institutional intent candle by candle. | Updated Wyckoff |
The conclusion is clear: when you learn the Wyckoff Method you are not learning "just another methodology", you are learning the common root of all modern institutional analysis. The concepts that SMC and CRT sell today on social media —Smart Money, manipulation, liquidity sweeps, displacement— are new terminology for principles that Wyckoff documented almost a century ago.
Fundamental Principles of the Wyckoff Method
Many of Wyckoff's basic principles have become core foundations of technical analysis. For example:
- The 3 fundamental laws: Supply and demand, Cause and effect, and Effort and result.
- The concepts of Accumulation and Distribution.
- The supremacy of price and volume when it comes to determining price.
The Wyckoff Method has passed the test of time
More than 100 years of continuous development and use have proven the value of the method for trading all kinds of financial instruments. This achievement should come as no surprise, as it is based on the analysis of price and volume action to judge how it reacts to the battle that takes place between the true forces that govern all price changes: supply and demand.
The 3 Fundamental Laws
Law of Supply and Demand
It is the true engine of the market. You will learn to analyze the footprints left by the interactions between the large operators. When demand exceeds supply, price rises; when supply exceeds demand, price falls.
Law of Cause and Effect
The idea is that nothing can happen out of nowhere; for price to develop a trend movement (effect) it must first have built a cause beforehand. The larger the lateral range (cause), the larger the subsequent trend movement (effect).
Law of Effort and Result
This is about analyzing price and volume in comparative terms to conclude whether market actions show us harmony or divergence. If there is a lot of volume (effort) but little price movement (result), it indicates absorption.
Practical examples of the laws in action
To truly understand the power of the Wyckoff Method, it is essential to see how these laws manifest in real trading situations:
1 Example of Supply and Demand
Imagine an asset that has been falling for weeks. Suddenly, a candle appears with high volume but price barely drops. This indicates that demand is absorbing all the supply. Sellers are dumping all their positions into the market in panic, but institutional buyers are there to absorb them without letting price fall further. This is a Selling Climax in the making.
The next day, if we see a rally with less volume, it confirms that selling pressure has been exhausted. The institutions have already accumulated what they wanted. The Wyckoff trader identifies this shift in the balance of power and prepares to look for buying opportunities.
2 Example of Cause and Effect
An asset has been moving sideways for 3 months between $100 and $110, forming a wide range with multiple tests of support and resistance. This lateral range is the cause that the institutions are building. The more time price spends in this range, the larger the subsequent movement (the effect).
When price finally breaks $110 decisively, the Wyckoff trader can project that the bullish movement should be at least equivalent to the height of the range ($10) or more. If the range lasted 3 months, the trend movement could last several weeks or months. The cause (3 months of accumulation) justifies a significant effect.
3 Example of Effort and Result
Price is in an uptrend and suddenly a candle appears with the highest volume of the last few weeks (effort), but price only rises 0.5% (result). This divergence between effort and result is a critical warning signal.
What is happening? All that buying volume should have pushed price much higher. The fact that it does not means there is institutional absorption: the large operators are selling into that volume, distributing their positions before a fall. The educated Wyckoff trader recognizes this warning and avoids buying at that moment, or even looks for short positions.

Volume is the heart of Wyckoff. When you want to take it to real order flow —delta, footprint, exact volume per price— the platform I use is NinjaTrader.
Affiliate link · paid partnership with NinjaTrader · #ad #NinjaTraderPartner
Advantages of the Wyckoff Method
Provides context and a roadmap
Context is quality information about the state the asset is in. Context tells us what is really happening in the market at all times and establishes our directional bias.
Thanks to the accumulation and distribution structures we can identify the participation of the professional, which will enable us to determine the general market sentiment up to the present moment and will help us know what to expect price to do next. All of this with the goal of assessing who is most likely in control of the market and where price will head afterwards.
The Events and Phases are elements exclusive to the methodology and help us map out the development of the structures. This positions us to know what to expect price to do after the appearance of each of them, offering us a roadmap to follow at all times.
Determines high-probability trading zones
The Methodology provides us with the exact zones where we will act, as well as examples of triggers to enter the market, making the task of where to look for trades as easy as possible.
The high-probability trading zones are those areas where you will have to make the decision to buy or sell. Our task as analysts is to identify them correctly and, when the time comes, assume the operator profile and wait for our entry trigger to send our orders to the market.
The Wyckoff Methodology in Depth
The best-selling book on the Wyckoff Method. 325 pages that will teach you to identify the footprints of institutional money and trade alongside smart money.
Types of market participants
Before getting into context, events and phases, it is worth being clear about who trades in the market. Wyckoff started from a simple observation — there is a handful of hands that move price and a public that follows them — and built his entire methodology on how to identify both on the chart. Modern markets have added new participants, but the original logic is still the best starting point.
The Composite Operator: the starting point
Wyckoff observed that there was a small group of ultra-capitalized, well-informed operators with real capacity to move price. They were the "super traders" of his time. To avoid being detected they ran their campaigns in secret, but their operations left a recognizable footprint on the charts. Wyckoff learned to read those footprints and named the group the "Composite Operator" (CO) — a fictional figure that personifies all those large operators acting as a single entity with coordinated intention.
The CO is not a conspiracy: it is a conceptual shortcut. Banks, investment funds, market makers and informed operators make similar decisions when reading the same data, and at the aggregate level their activity behaves as if a single giant hand were moving the asset. That simplification makes it easier to anticipate their behavior within the cycle: it accumulates in ranges after bearish trends when the public sells in panic, drives the uptrend, distributes in ranges after bullish trends when the public buys with euphoria, and finally drives the downtrend.
The goal of the Wyckoff Method is to identify which phase of the cycle the Composite Operator is in to trade in its same direction. The Wyckoff student tells the CO's story over and over on the chart until their thinking and action end up aligning with the professional activity.
With this figure as an anchor, the practical question is: how do we distinguish the CO from the rest? The classic criterion — the one used since Wyckoff's own time — is capacity: strong hands vs weak hands. It worked well in a market where there was a reasonably balanced duel between professionals and the public. But today's markets are a different beast, and that is why the criterion is worth updating. That update is one of the contributions I advocate in my books: shifting from thinking about capacity to thinking about information.
Strong hands vs weak hands: the classic criterion
Initially the terms referred to the emotional capacity of each operator: strong hands would be those who do not make decisions from emotion, and weak hands those who capitulate in moments of stress. Over time the concept evolved toward a distinction of financial capacity: large institutional operators (the raw material of the CO) against small retail operators.
This second definition has a problem: in the most liquid markets in the world, practically all the volume is institutional. The relevant battle is not "retail against institutions", but between different institutions against each other. And not all large operators win: many institutional vehicles show poor returns and are precisely the liquidity that the genuinely well-positioned hands — the true CO — need to get in and out. Size is a necessary condition, but not sufficient.
Well-informed vs poorly-informed: the reading I propose
Given the evolution of the market, where the flow is massively institutional, it no longer makes as much sense to keep talking about strong hands vs weak hands as an operational category. That is why, in my books and training, I propose shifting the criterion: from capacity to information. The useful distinction today is by information: well-informed vs poorly-informed. The well-informed are those who have reliable analysis (privileged information, accurate technical valuation or the ability to identify the institutional footprint on the chart). The poorly-informed are those who make valuations that do not match reality or who cannot interpret what price is showing them. The operational consequence is key: you can be a strong hand by capital and be poorly-informed, or small in account and well-informed. It is information — not size — that determines which side you are on.
The data on volume composition supports this change of framework. In US equities, the retail share reached its all-time high at around 22-23% of volume during the meme-stock peak of January 2021 (Bloomberg Intelligence; JPMorgan Global Research) and has stabilized at around 17.9% in 2024 (SIFMA). That is: even at its best moment, retail did not reach a quarter of the flow, and the rest — more than 80% — is institutional. In crypto, the asset that was sold as "the retail market", Coinbase reported in Q1 2024 that 82% of its volume was institutional ($256B) versus 18% retail ($56B), after spot ETFs came into play. The conclusion is straightforward: the relevant battle is no longer retail vs institutional — there is barely anyone to fight it with. It is between well-informed institutions and poorly-informed institutions. That is why the classic strong/weak hands dichotomy has become too small: what separates winners from losers today is not capital, it is information.
The operational news: the Wyckoff methodology and Volume Spread Analysis put you in a position to identify the institutional presence and trade on the side of the well-positioned — even if your account is small. You do not need the CO's capital; you need to read its footprints.
Other participants: non-directional flows
Alongside the classic directional duel coexist other groups whose common denominator is that they do not trade with an opinion on the direction of the asset and yet have a real weight in price formation. Their mere existence explains phenomena that are otherwise confusing: moves without a clear directional narrative, genuine structures invalidated from the outside, displacements whose force seems disproportionate relative to the visible informed flow.
Market makers
They capture the spread between bid and ask without taking direction. They keep inventory close to zero (delta-neutral) and are required to quote on both sides during trading hours. Their cushioning function contains displacements when it works normally; when it weakens — because they detect adverse flow and reduce exposure —, that cushion disappears and any directional push spreads with less opposition. Part of the violence of certain extreme moves comes from the temporary vacuum in the usual counterparty, not only from the side that initiates them.
Options dealers
In assets heavily traded with options (major indices, megacaps, leading ETFs) they make a market on the contracts side. Each trade they execute leaves them a residual directional exposure on the underlying that they are required to neutralize by buying or selling the reference asset in a non-discretionary way. Part of the buy/sell flow comes from dealers who do not take a directional position but neutralize the risk of their derivatives activity. This flow can amplify moves through phenomena such as the gamma squeeze.
Systematic strategies
They buy or sell following predefined rules, without reading the chart. Risk parity and volatility targeting strategies adjust exposure according to realized volatility (when it rises, they sell; when it falls, they buy). CTAs and trend funds add mechanical flow that amplifies directional legs. Leveraged ETFs rebalance daily at the close. Their common feature — mechanical pro-cyclicality — explains why contemporary legs tend to be longer and more sustained than a pure reading of institutional intent would suggest.
Wyckoff's key contribution remains valid: regardless of how many types of participants intervene and the motivations — directional or not — that each one has, they all end up reflecting their activity on a single observable variable: price, accompanied by volume. We do not need to classify each trade by its origin; we read the result and recognize the footprints that appear, because at the aggregate level they prevail over the noise and leave a recognizable trail.
Context
The main advantage of the Wyckoff Method over any other approach is that it gives you context: quality information about the state the asset is in. Context tells you what is really happening in the market at all times and establishes your directional bias. Without context, trading is flipping a coin with extra steps.
The 4 phases of the price cycle
Wyckoff describes price movement as a cycle with four macro phases: accumulation, uptrend, distribution and downtrend. It is not a rigid formula that always appears, but it is a recurring pattern when there is professional intent behind the asset:
The Wyckoff cycle: the 4 market phases
1. Accumulation
Professional demand absorbs available supply in a range. As long as significant supply remains, price has difficulty rising with continuity; when it is exhausted, the path of least resistance tends to be bullish.
2. Uptrend
After accumulation, price moves up with relative ease because supply has been consumed during the range. The first legs are usually the cleanest and fastest: vacuum effect.
3. Distribution
Professional supply places positions taking advantage of the available demand. You will see moves that look like strength but fail, breakouts that do not continue and a progressive inability of price to sustain advances.
4. Downtrend
After distribution, price falls with greater speed and violence than bullish rises: fear triggers liquidation chains faster than greed. Markets take the stairs up and the elevator down.
Pauses within the cycle: re-accumulation and re-distribution
Price rarely completes a "clean" cycle. When it comes in an uptrend and makes a lateral pause before continuing to rise, that structure is identified as re-accumulation. Symmetrically, a pause within a downtrend is identified as re-distribution. The idea is not to put names on things for the sake of it: it is to not confuse you. If you are in a bullish impulse and you see a range, distinguish whether it acts as a healthy pause (re-accumulation) or as the start of a change of control (possible distribution).
There is a nuance that saves many misunderstandings: re-accumulation can correct in time (lateral range that barely drops, consuming days or weeks until the pending supply is exhausted) or correct in price (active bearish pullback that discounts part of the previous impulse, sometimes looking like a minor distribution inside). As long as price does not re-enter the original range or lose the key structural supports, the larger cause remains intact and the trend has pending continuation. Confusing a price correction with a trend reversal makes you close long positions at the worst moment — right before the new impulse. The same applies to the bearish side: a re-distribution can correct in time (lateral) or in price (active bounce that scares the shorts before continuing down).
Path of least resistance and contraction/expansion dynamics
If the path of least resistance is bullish, price will tend to rise more easily than fall; if it is bearish, the opposite will happen. Don't guess the path: demand it. Let the market show you continuity and results.
There is an underlying dynamic worth internalizing: the market constantly alternates between contraction (consolidation, pause, range) and expansion (displacement, impulse, trend). After an expansion, a contraction is most likely to come. The more extended the move, the more likely the contraction is near. The operational consequence is direct: the highest-quality opportunities appear during the contraction phases, not during the expansion ones. The moment to build a position is when the market consolidates, not when it displaces violently.
The 7 characteristic events of the Wyckoff Method
Events are the specific price actions that mark each stage of the transfer of control within a range. Wyckoff identified seven events that, chained together, form the natural sequence of an accumulation or distribution process. They do not always all appear nor always in the same form, but the logic that unites them responds to the universal process: stopping the previous trend → building the new cause → starting the new trend. It is the same supply and demand mechanics: exhaustion + absorption + initiative.
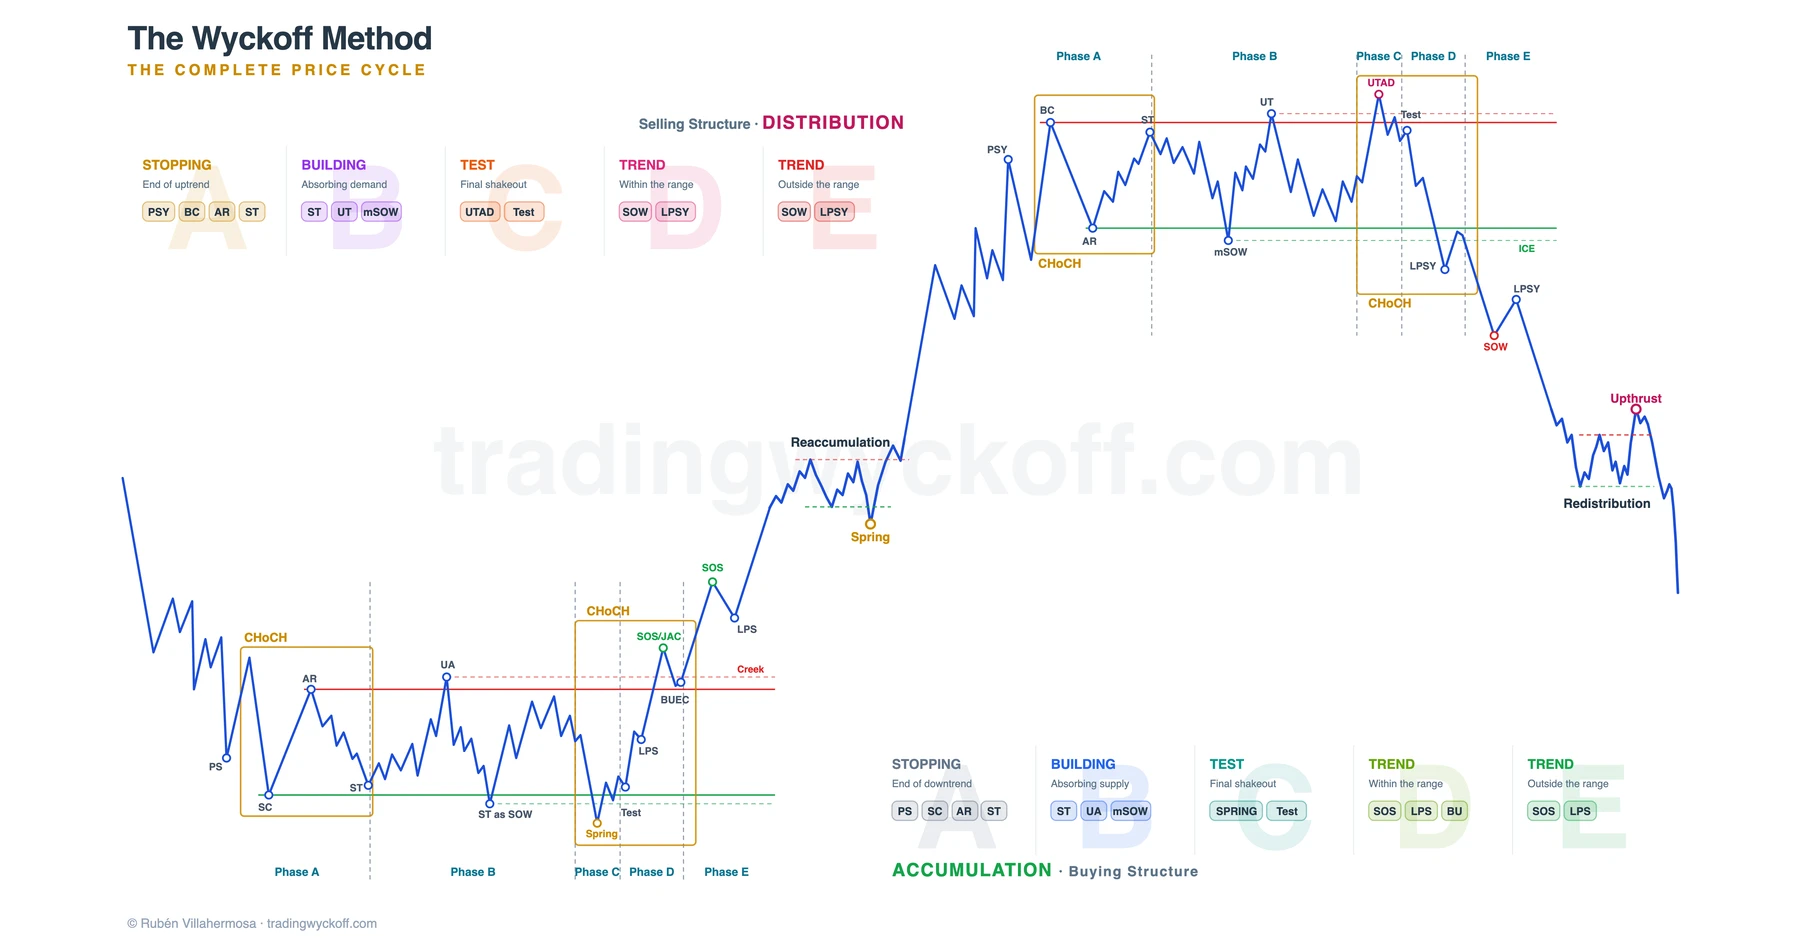
Complete accumulation schematic with the 7 events distributed by phases
Important: events are not labels that you "stick" onto the chart in real time. They are hypotheses validated by the subsequent price action. You label a Selling Climax as potential when you observe it; you confirm it as genuine when price develops the reaction and the test that follow it.
Event 1: Preliminary Stop (PS / PSY)
It is the first sign that the previous trend may be losing strength. In accumulation it is called Preliminary Support (PS); in distribution, Preliminary Supply (PSY). It appears when operators positioned in favor of the trend begin to take profits — and that closing of positions (buying when they were short, selling when they were long) generates the first visible stop.
It is very common to find multiple preliminary stops before the definitive one: the trend has inertia. Each attempt absorbs supply or demand from the market and when the climax arrives it may do so with lower volume, because the dominant pressure has been progressively consumed.
Operational limitation: in real time the PS is practically indistinguishable from the Selling Climax — both manifest with high volume, range expansion and rejection. Only the subsequent development allows classifying one and the other. Its value lies more in context reading (a signal that the trend may be losing inertia) than in immediate decision-making.
Event 2: Climax (SC / BC)
It is the action that stops the previous trend visibly. In accumulation it is called Selling Climax (SC); in distribution, Buying Climax (BC). The dominant pressure reaches its maximum point of intensity and, in doing so, exhausts itself. It is what financial literature calls capitulation: the moment of maximum emotion where participants liquidate positions at any price.
The extreme of the climax defines one of the limits of the range that begins to form. After it, price should react in the opposite direction (Automatic Rally/Reaction) and subsequently return to test that zone (Secondary Test). If the sequence completes, we have Phase A confirmed.
Climax or exhaustion: two ways to stop the trend
Not all trends end with a spectacular climactic event. There is a silent alternative worth knowing and one that I incorporated into the Wyckoff reading in my books precisely because the classic formulation did not give it its own entity: exhaustion — Selling Exhaustion in accumulation, Buying Exhaustion in distribution. Instead of a volume spike with range expansion, the dominant pressure gradually disappears. Normal-range candles, average or low volume, and a progressive inability to make new extremes. Functionally it plays the same role as a climax — it stops the trend —, but it leaves a much less spectacular footprint and that is why it goes unnoticed by those who only look for the obvious climactic peak. Having it on your radar widens the number of legitimate stops the trader is able to identify.
Event 3: Reaction (AR)
After the climax, price develops a move in the opposite direction that confirms the stop and defines the other extreme of the range. In accumulation it is called Automatic Rally (AR); in distribution, Automatic Reaction (AR). It is the first change of character (ChoCH in SMC terminology): it effectively ends the previous trend and opens the lateralization stage.
The distance the reaction travels is valuable information. A comparatively large reaction suggests underlying strength of the side that has just taken initiative. A weak, choppy reaction without volume suggests that control may still be in the previous dominant side. After a Selling Climax, a weak AR suggests we could be facing a re-distribution instead of an accumulation — and it applies equally in mirror image.
Event 4: Secondary Test (ST)
The fourth event closes Phase A. The Secondary Test (ST) is the return of price to the climax zone to verify whether the pressure that stopped it is still present. If it no longer appears, the path toward the opposite direction is cleared and Phase A can be considered closed.
For the test to be successful it must show three characteristics simultaneously:
- Narrowing of ranges relative to the climactic event.
- Lower volume than that seen at the climax. The climax/test volume asymmetry is one of the best quality indicators.
- Ability to hold without the pressure of the previous side reappearing with force.
Beyond the official ST of Phase A, the test behavior reappears throughout the entire structure: in individual candles (No Supply / No Demand from VSA), in rotation zones during Phase B, after the shakeout (Spring/Upthrust test) and after the breakout (LPS/LPSY). In all cases the logic is the same: a test is valid when the opposite side has stopped pressing.
Event 5: Shakeout (Spring / UTAD)
It is the event Wyckoff traders wait for. There is no other that adds more confidence to the analysis. In accumulation it is called Spring (or Shakeout); in distribution, Upthrust After Distribution (UTAD). After the stop and the building of cause, the professional side needs to perform one last maneuver: sweep the liquidity accumulated on the other side of the range extremes.
Price breaks an extreme of the range in what looks like a genuine breakout — what in contemporary terminology is known as a stop run, liquidity sweep, liquidity grab (SMC/ICT) or bear/bull trap. That apparent breakout attracts breakout traders, ejects stops and forces the closing of positions that anticipated the turn but were too early in their timing. When the maneuver completes, price reverts and re-enters the range, leaving a false breakout that marks the start of the final imbalance.
Three types of Spring according to volume
Spring #1 / Terminal Shakeout (high volume)
Deep penetration with extreme volume. Supply is still active. For it to be successful, very aggressive demand must come in to revert price with wide ranges and high volume. Riskiest variant: it demands an immediate response.
Spring #2 (moderate volume)
Contained penetration with some increase in volume. There is floating supply but not overwhelming. It requires subsequent tests that verify the absorption. Most frequent Spring and the best balance between reliability and confirmation.
Spring #3 (low volume)
Most powerful variant. Total exhaustion of supply: slight breakout, volume decreases, ranges narrow. It can be traded directly without waiting for confirmation: the very absence of volume is the confirmation.
From left to right: Spring #3 (low volume), Spring #2 (moderate volume) and Spring #1 or Terminal Shakeout (high volume).
The relationship between the three types is not coincidental: it responds to the Law of Effort and Result. The penetration below support measures how much supply is still active, and volume, how much demand is needed to overcome it. The deeper the breakout, the more sellers remain to be absorbed and the greater the buying effort needed to revert price to the range: that is why the Spring #1 / Terminal Shakeout demands an explosive demand entry and is the riskiest variant — if that response does not appear immediately, the shakeout fails. At the opposite extreme, the Spring #3 barely pierces support and volume dries up: supply is exhausted and a slight push is enough to turn price. That is the paradox of the event: the variant that looks weakest on the surface — the one with the least volume — is actually the most reliable, to the point of being tradable without waiting for confirmation.
Event 6: Breakout (SOS / SOW)
After the shakeout (or the LPS that replaces it), price develops an imbalance move that breaks the structure. In accumulation it is called Sign of Strength (SOS); in distribution, Sign of Weakness (SOW). It is the second change of character — what in SMC/ICT is called CHoCH or Market Structure Shift: the transition from range to new trend.
In the bullish breakout the dynamic feeds back on itself: the triggering of stops above resistance (buy-stop cascade) combines with the forced closing of trapped shorts (short squeeze) and the entry of momentum buyers. Each forced close pushes price higher, triggering more closes. In the bearish breakout, the symmetrical cascade of forced liquidation of longs amplifies the fall.
When the SOS breaks resistance, that action is also known as Jump Across the Creek (JAC), using Wyckoff's classic creek analogy: price "jumps" the resistance zone and settles on the other side. The bearish equivalent is the Fall Through the Ice: price "breaks the ice" that was holding the structure. Consistent with the asymmetry we have been pointing out, the SOW tends to be more abrupt and fast than the SOS.
Event 7: Confirmation (LPS / LPSY)
The last event is the test that confirms the breakout. In accumulation it is called Last Point of Support (LPS) or Back Up to the Edge of the Creek (BUEC); in distribution, Last Point of Supply (LPSY). In conventional technical analysis this move is known as a throwback (bullish) or pullback (bearish).
The breakout is only "potential" until its test validates it. The test looks for a corrective move with characteristics of lack of interest (narrow ranges, low volume, no urgency) that demonstrates the opposition has withdrawn. If price pulls back toward the broken zone and does not penetrate it, without volume or aggressiveness, the breakout is confirmed.
The confirmation test was Wyckoff's favorite position to enter the market: you have all the previous price action in your favor (cause built, shakeout validated, breakout with intent) and the risk is relatively low because you can invalidate the position if price re-enters the range.
Summary of the complete process
The stop halts · the climax exhausts · the reaction delimits · the test verifies · the shakeout cleans · the breakout imbalances · the confirmation validates. The seven events are not names to memorize: they are the pieces of a process that explains how the market transitions from trend to range and from range to new trend.
Advanced Wyckoff Course + Volume Profile
One-time payment · Lifetime access
- +90 videos (+10h of content)
- Includes the Volume Profile course
- +50h of live session recordings
The Wyckoff market phases
If the events answer "what has happened", the phases answer "where in the process we are". The phases organize the events into a chronological sequence that lets you know not only what has occurred, but where the structure is within the cycle. They are the piece that connects the point-in-time reading with the anticipation of the next move.
The five phases: from A to E
| Phase | Function | Associated events |
|---|---|---|
| Phase A | Stopping the previous trend and establishing the limits of the range | PS · Climax · AR · ST |
| Phase B | Building cause. Buyers and sellers fight for control through tests at both extremes | Internal tests (UA, UT, mSOS, mSOW) |
| Phase C | Terminal event. Defines which side has taken control through the shakeout | Spring / UTAD + shakeout test |
| Phase D | Resolution of the range into a new trend. Breakout and confirmation | SOS / SOW + LPS / LPSY |
| Phase E | Development of the new trend outside the range | Tests on small re-accumulations / re-distributions |
Why the order matters
Each phase prepares the next. You cannot expect a shakeout (Phase C) if the cause has not had time to build (Phase B). There is a criterion of proportionality between phases worth memorizing: Phase B should consume, at a minimum, a proportionally equal or greater amount of time than Phase A. When that proportionality has been met, any shakeout that occurs at the extremes has more powerful implications as a possible start of the imbalance.
If a shakeout appears before that proportionality is met, it can be traded, but with less confidence and a higher requirement for subsequent confirmation. Another practical criterion: if there has already been a shakeout to the upside in the range, the probability that a subsequent bearish breakout is genuine (and not another shakeout) increases, because the move may be a direct consequence of the prior shakeout.
Proportionality is not always met: fast reversal schematics
The A-B-C-D-E schematic we have just described is the slow, complete development, the one that appears when there are large operators interested in building a campaign of a certain size and they need time to absorb liquidity without moving price. But the market does not always behave this way. When there is urgency — an abrupt change in conditions, news that alters the narrative, or simply a campaign that requires less volume than usual — the reversal can occur without there being time to build a large prior cause. Applying the slow schematic as dogma in those contexts leads you to ignore valid signals and miss the move.
To integrate those contexts without abandoning the Wyckoff logic, in my books (Trading and Investing for Beginners and The Wyckoff Methodology in Depth) I propose working with four fast reversal models that compress the same underlying mechanics (stop + test + imbalance) into much less time. It is one of the contributions I have been introducing into the Wyckoffian community — along with reading exhaustion as an alternative to the climax — so that the trader stops being left out of the reversals that do not fit the classic A-B-C-D-E schematic.
The key lies in how they are read: the process is sequential. The trader does not guess which schematic will come; they observe in real time and rule out possibilities, transitioning to the next as each one is invalidated. The logical order is:
1. Climax
First possibility: a round-trip leg that halts the previous trend with the whole process (exhaustion + absorption + initiative) compressed into a few candles. The exact reversal is usually untradable due to speed and risk; the trade comes with the subsequent reading. Activation of the next possibility: if the climax fails to move price and it tries again to continue the previous trend, we move to watch for the failure.
2. Failure
After the first reversal, the market does not give back the whole move but makes a new continuation attempt that does not reach the previous extreme and reverts. It shows early inability of the dominant side. Activation of the next possibility: if the second move does manage to reach the previous extreme (the failure "fails" because price does not fall short), we discard the failure and open the reading of the double.
3. Double bottom / double top
If no failure appears and price does reach the previous extreme, it may turn right at that zone without clearly surpassing it. The double is the logical reading when the first attempt does not return inability but the second one does. Activation of the next possibility: if price breaks the high (or low) of that extreme, the double is invalidated and we enter a trap scenario.
4. Trap (shakeout)
If it does not turn as a double either and it slightly surpasses the extreme, a liquidity sweep with immediate re-entry can occur. It is the compressed version of the Spring / Upthrust, but without having built a complete range behind it. Activation of the next possibility: if price does not re-enter with rejection and the breakout ends up being accepted, we also discard the fast reversal and move to the final scenario.
Each model in its top version (bearish reversal) and bottom version (bullish reversal). The orange circle marks the key point; the numbers reflect the logical reading sequence: each schematic is watched when the previous one is invalidated.
If the trap is also ruled out, two possible readings remain and they are worth distinguishing carefully:
- Consolidation within a larger trend: the market did not want to turn — it was only digesting the previous leg before continuing in the same direction. The absence of fast reversals in any of their four formats is, in itself, a continuation signal.
- Start of a slow Wyckoff range development: the reversal exists but requires more cause. Here we transition to the classic A-B-C-D-E schematic, where cause is built by phases before the final imbalance.
The way to distinguish between the two is the one we have already seen: prior context, price behavior at the extremes and, above all, the continuity or lack of it in the direction of the previous trend. A continuation consolidation tends to resolve quickly and in favor of the trend; a new Wyckoff range process tends to drag on, show ambivalence at the extremes and rebuild control for the opposite side.
The practical lesson: the method requires flexibility. Proportionality between phases is a valuable guide when the market develops a slow schematic, but it is not a mandatory requirement. What stays constant across all formats is the underlying logical sequence (stop → test → imbalance); what varies is the speed at which the market expresses it. The rigid trader always waits for the complete schematic and misses the fast reversals. The adaptive trader reads in real time which possibility is active, which has been invalidated and which has just opened.
Roadmap and scenario planning
Here is, in my opinion, the most powerful differentiating advantage of the Wyckoff Method over any other approach. Once you know the events and the phases, you stop seeing the chart as a succession of isolated candles and start seeing it as a process with logical sequence. That sequence is your roadmap: it not only tells you what has happened, but what should happen next if the structure is still valid — and what would indicate that the structure has changed its nature.
The reasoning is always conditional. It is not about predicting the future, but about having laid out what to expect in each possible scenario and what would confirm or invalidate each one. That discipline puts you in a position to anticipate instead of react.
Conditional reasoning: "If X, then Y"
The mental structure of the Wyckoff trader is always the same — whatever the phase and the asset:
"If price has done X, it is most likely to do Y."
Each event is validated when the expected behavior appears after its occurrence. If it appears, the structure advances to the next step and the scenario gains probability. If it does not appear — or the opposite appears — the scenario you had in mind has just been invalidated and another alternative scenario becomes the main one. The chart stops being noise and becomes a conversation: the market answers every question you ask it and confirms or refutes your hypothesis in real time.
Practical examples of the roadmap in action
These are the conditionals that a Wyckoff trader has prepared depending on where in the structure price is. Notice that each one carries its own invalidation condition: it is not only about knowing what to expect, but what would tell you the scenario is dead.
After the climax in Phase A
"If the Selling Climax has halted the fall with explosive volume, it is most likely that a strong Automatic Rally appears that defines the top of the range, and subsequently a Secondary Test with lower volume that confirms the absence of selling pressure. If the ST arrives with high volume or breaks the low of the SC, the stop is not consolidated and I must wait before treating the range as accumulation."
Inside Phase B
"If the range has spent enough time building cause and the internal tests lose volume, it is most likely that the next visit to the extremes is the shakeout in Phase C — Spring below if it is going to be accumulation, UTAD above if it is going to be distribution. My job here is not to pick a side yet: it is to have both scenarios laid out with their levels to react to whichever one the market activates."
After a Spring in Phase C
"If the Spring has occurred with rejection and the subsequent test arrives with low volume, it is most likely that price develops a Sign of Strength toward the top of the range. If that SOS does not appear and price pierces the low of the Spring again, the bullish scenario has been invalidated: the reading becomes bearish continuation and I must look for opportunities in the opposite direction."
After the SOS in Phase D
"If price has broken the top of the range with high volume and wide candles, it is most likely that it pulls back to test the broken level as LPS or BUEC before starting Phase E. That zone is my primary trade entry. If the pullback re-enters the range without reaction and loses the lower half, the breakout was false and the bullish scenario is over: I must close and reconsider."
Already in trend, Phase E
"If the trend advances with wide impulses and shallow corrections, it is most likely that each new consolidation works as a re-accumulation in favor of the move. If a correction becomes deeper and stops respecting rising lows, the trend is losing steam and the possibility of a higher-degree distribution opens up: the map calls for operational caution and laying out the reversal scenario."
How to lay out scenarios well
Laying out scenarios is not an academic exercise: it is the discipline that separates the profitable trader from the one who reacts. A good plan meets three non-negotiable rules:
- At least two opposite scenarios: one bullish and one bearish. Even if the context clearly tilts you toward one, the other must be laid out with its levels. This neutralizes confirmation bias and prepares you to react quickly if the market goes the opposite way.
- Each scenario carries a zone, a trigger and an invalidation: it is not enough to say "this can go up or down". You must specify where you enter (zone), what confirms the entry (trigger) and what exact level tells you the scenario is dead (invalidation). Without these three elements, it is not a scenario: it is a wish.
- Treat each scenario as provisional: the market leaves footprints in real time. As they appear, one scenario gains probability and another loses it. When one is invalidated, you discard it without getting emotional and work with the ones that are still alive. Clinging to an invalidated scenario because "you saw it first" is the most expensive mental mistake of the Wyckoff trader.
The key mental shift: stop asking yourself "what is price going to do?" and start asking yourself "what would have to happen for each of my scenarios to activate?". The first approach is prediction and ties you emotionally to a hypothesis. The second is probability management and keeps you flexible. It is the difference between trading the market and arguing with it.
When you have the roadmap internalized and the scenarios laid out, you stop seeing the chart as a succession of loose events and start reading it as a process. Without scenarios laid out, everything else — structures, zones and triggers — is noise without context.
Complete structures: how everything integrates into the Wyckoff schematics
So far we have broken down each piece separately: participants, context, events, phases and trading zones. Now is the time to see it all integrated. The basic accumulation and distribution schematics are the visual representation of how all these pieces assemble into a coherent sequence. They are not formulas to memorize — they are reference maps to recognize the institutional dynamic when it appears on the chart.
Financial markets are a living entity, constantly changing. It is practically impossible for price to develop two identical structures, which is why the Wyckoff methodology proposes a flexible approach: use the schematics as a reference, not as a straitjacket. What stays constant are the events and phases; what varies is the way price expresses them.
You will see two accumulation schematics (bullish) and two distribution ones (bearish), with their differences in the depth of the shakeout and in the position of the breakout. Identify the events you already know (PS, SC/BC, AR, ST, Spring/UTAD, SOS/SOW, LPS/LPSY) and observe how they are distributed across phases A-E. It is the practical closing of all the theory.
These schematics are the ideal ones. The market will not always present them in this exact form — and precisely for that reason it is important to understand the underlying logic, not the exact form.
Wyckoff accumulation schematics
An accumulation range is a lateral price movement that appears after a bearish phase and within which a buying campaign develops. The goal is to build a position at relatively low prices to benefit from the subsequent bullish move. It is not about "buying everything at once": a professional operator cannot send a massive order without paying worse prices due to their own impact. That is why accumulation is, in essence, a process: buying in stages, absorbing available selling, generating liquidity when needed and repeatedly checking whether supply is still present.
During the previous bearish move, control of the market is mainly in poorly-informed operators. As price falls, control gradually shifts: the more it falls, the greater the positioning of the well-informed operators. It is during the development of the accumulation structure where the final process of intervention by the large operators takes place, the moment at which price is ready to start the upward move. The correct reading does not aim to "nail the low", but to identify that the seller stops dominating and demand gains the ability to hold price after each test.
The schematics you will see below are reference maps, not rigid templates. The market never presents two identical structures; what stays constant are the events and phases, what varies is the way price expresses them. We will see two variants — with and without shakeout — and close with the general characteristics that distinguish an accumulative schematic from a distributive one.
Variant #1: with shakeout (Spring) in Phase C
Basic accumulation schematic with shakeout (Spring) in Phase C
Key concepts:
- Accumulation: Process by which the large operators absorb the available stock in the market. Transfer from poorly-informed operators to well-informed operators.
- Creek: Resistance level for accumulation or re-accumulation structures. It is established by the high generated by the Automatic Rally and by the highs that may develop during Phase B.
- CHoCH (Change of Character): Signals the environment in which price will soon move. The first CHoCH is established in Phase A where price moves from a bearish trend environment to a consolidation environment. The second CHoCH is established from the low of Phase C to the high of the SOS.
PHASE A: Stopping the previous bearish trend
It is the first attempt to stop the bearish move that will always fail.
Climactic action that stops the bearish move.
Bullish move that establishes the high of the range.
Establishes the end of Phase A and the start of Phase B.
PHASE B: Building the cause
Temporary break of resistance and re-entry to the range. It is a test of the high generated by the AR.
Temporary break of support and re-entry to the range. It is a test of the low generated by the SC.
PHASE C: Test
It is a test in the form of a break of the lows of Phases A and B. There are three different types of Springs.
Bearish move toward the lows of the range with the goal of checking the sellers' commitment.
Test in the form of a bearish move that does not reach the low of the range.
Abrupt move that breaks the lows producing a deep penetration of the support level and a rapid recovery.
PHASE D: Bullish trend within the range
Bullish move generated after the Phase C Test event that manages to reach the top of the range. Also called JAC (Jump Across the Creek).
These are the rising lows we find in the bullish move toward resistance.
It is the last big reaction before the bull market begins. Also called BUEC (Back Up to the Edge of the Creek).
PHASE E: Bullish trend outside the range
Succession of SOS and LPS generating a dynamic of rising highs and lows.
Variant #2: without shakeout to the lows
Basic accumulation schematic without shakeout to the lows of the range
Second variant of the methodology in which the test event in Phase C does not reach the lows of the structure.
It generally occurs because the current market conditions show underlying strength. Price's goal is to go and visit that liquidity zone but the large operators support the market by entering aggressively on the buy side. They do not allow price to fall further so that no one else can buy lower.
This type of range is harder to identify because, not being able to evaluate that shakeout action, the bullish plan loses a point of confidence.
Key point
The primary zone to trade is at the potential Spring; so, when buying at a possible LPS, the doubt will always arise of whether price will first visit that zone of lows to develop the Spring. In addition, that first show of bullish strength produced by the breakout of the range is generally missed. The only viable buying opportunity in this type of structure is found at the BUEC.
Characteristics of accumulation schematics
Beyond the specific variant the structure takes, there is a recognizable behavior pattern that appears when an accumulation is maturing. Without turning it into a rigid checklist, it is worth keeping in mind because it lets you read a structure even if it does not fit precisely into one of the basic schematics. It is the operational translation of the idea that "the market calms down as supply is consumed":
- The range calms progressively: lower volatility and lower overall activity as supply is consumed. If the structure becomes increasingly agitated instead of calming down, it is worth re-evaluating the accumulative reading.
- Bearish attempts lose effectiveness: price shows increasing difficulty reaching or holding the lower part of the range and, when it does, the bullish responses that follow gain quality.
- Asymmetry between bullish and bearish moves: bullish moves start covering more distance and more easily than bearish ones, and volume accompanies that asymmetry.
- Subsequent acceptance after clearing the upper zones: toward the end of the process, price clears the upper zones of the range with visible intent and, above all, does not re-enter. The corrections that follow have a corrective, not impulsive, character.
No isolated trait validates an accumulation. The strength lies in the convergence of signals and, above all, in the subsequent price response. These characteristics are one of the footprints used to distinguish an accumulative structure from a distributive one, as we will see in the block dedicated to continuation vs reversal.
Wyckoff distribution schematics
A distribution range is a lateral move that stops a bullish phase and within which a selling campaign develops. The goal is to build a short position or unload inventory at high prices to benefit from the subsequent bearish move. The execution follows the same staged logic as in accumulation: the professional side needs to sell methodically, absorb buying, manufacture counterparty and avoid moving price against itself before completing its plan.
Where distribution truly differs is in its character and psychology. If in accumulation the terminal event — the Spring — takes advantage of fear and capitulation (participants who sell at the lows out of panic or stops being triggered), in distribution the equivalent event — the Upthrust / UTAD — takes advantage of euphoria and greed: price clears the highs of the range and attracts aggressive buying that interprets the breakout as the start of a new bullish leg. That wave of buying is exactly the counterparty the well-informed operators need to complete their selling campaign.
It is worth keeping in mind an important asymmetry: bearish moves tend to be faster and more violent than bullish ones. Fear generates more immediate urgency than greed: when price starts falling hard, liquidation chains are triggered (stops, margin calls, forced selling) that feed back into the move. That is why it is said that markets take the stairs up and the elevator down. Risk management in distributive contexts is especially critical because the speed of the move can exceed your ability to react if you do not have an invalidation plan defined beforehand.
We will see next two variants — with and without shakeout — and close with the general characteristics that distinguish a mature distributive schematic.
Variant #1: with shakeout (UTAD) in Phase C
Basic distribution schematic with shakeout (UTAD) in Phase C
Key concepts:
- Distribution: Process by which the large operators distribute (sell) stock. It is a transfer from well-informed operators to poorly-informed operators.
- ICE: Support level for distribution or re-distribution structures. It is established by the low generated by the Automatic Reaction and by the lows that may develop during Phase B.
- CHoCH: Signals the environment in which price will soon move. The first CHoCH is established in Phase A where price moves from a bullish trend environment to a consolidation environment. The second CHoCH runs from the high of Phase C to the low of the SOW.
PHASE A: Stopping the previous bullish trend
It is the first attempt to stop the rise that will always fail.
Climactic action that stops the bullish move.
Bearish move that establishes the low of the range.
Establishes the end of Phase A and the start of Phase B.
PHASE B: Building the cause
Same event as the UA of accumulation. Temporary break of resistance and re-entry to the range. It is a test of the high generated by the BC.
Minor show of weakness. Temporary break of support and re-entry to the range. Test of the low generated by the AR.
PHASE C: Test
It is a test in the form of a break of the highs of Phases A and B.
Bullish move that rises to check the buyers' level of commitment.
PHASE D: Bearish trend within the range
Bearish move originated after the Phase C Test event that manages to reach the lower part of the range generating a change of character.
Last level of demand support. These are the falling highs we find in the bearish move toward support.
PHASE E: Bearish trend outside the range
Succession of SOW and LPSY generating a dynamic of falling highs and lows.
Variant #2: without shakeout to the highs
Basic distribution schematic without shakeout to the highs of the range
Second variant of the methodology in which the test event in Phase C does not reach the highs of the structure.
Inverse reasoning to the example of accumulative schematic #2. It shows greater underlying weakness. Price tries to reach the liquidity at the highs but the large operators who are already positioned short prevent it.
Key point
Structures with a loss of confidence due to the absence of the shakeout. When entering short at the possible LPSY, we will always have the doubt of whether price will go and perform the shakeout to the highs before falling. The show of weakness (SOW) that breaks the structure is missed. The only opportunity is at the test of the breakout (LPSY).
Characteristics of distribution schematics
Unlike accumulation, where the range tends to calm down, distribution usually shows a much more agitated character. It is the operational translation of the seller side needing to generate wide rallies to attract buying counterparty without compromising the path of least resistance. The typical traits:
- Agitated character: elevated volatility, wide moves that travel the structure from extreme to extreme in zigzag and a generally high and sustained volume, often with unusual spikes.
- Bullish attempts lose effectiveness: price shows increasing difficulty reaching or holding the upper part of the range. When it does, the bearish responses that follow are forceful and travel a good part of the structure.
- Inverted asymmetry: bearish moves start displacing with greater ease and volume than bullish ones, and support levels keep giving way without effective recovery.
- Subsequent acceptance after breaking the lower part: toward the end of the process, price breaks the lower part with visible intent and subsequent acceptance — it does not re-enter, and the rallies that follow have a corrective, not impulsive, character.
- Spectacular but deceptive bullish legs: during an active distribution, upward legs can appear with large candles and high volume that give the impression of strength. If you evaluate them by their subsequent result — do they hold? do they have continuity? — you will see that many are given back at the same speed, leaving participants trapped at the highs. That "attract and give back" dynamic is a characteristic footprint of distribution.
The valid reading is contextual: you do not trade a label, you trade the sequence of behavior and its confirmation. As with accumulation, these characteristics are the general footprint that is cross-referenced with the rest of the filters (how the range starts, relative development time) to distinguish a distributive process from an accumulative one, as we will see next.
How to distinguish between continuation and reversal structures
Once a range structure is identified, the key question is: am I facing a continuation pause or a real change of control? A re-accumulation (pause that continues the uptrend) and a distribution (reversal that ends it) can start exactly the same: a range after a bullish leg. The same happens on the bearish side between re-distribution and accumulation. Confusing one scenario with the other is one of the most expensive mistakes of the Wyckoff trader. There are three footprints that, combined, give you a much more reliable reading than any of them in isolation.
Footprint 1: how the range starts
The way the first stopping event occurs biases the reading from the start of the range. When the range starts with an evident climactic event (high volume, range expansion, abrupt stop), the reading leans toward a possible complete market rotation: there has been a massive exchange of stock and, with it, a significant change of hands. The process could be preparing a trend reversal.
In contrast, if the range starts without observing large volume, the first hypothesis is that a large number of stocks/units/contracts has not been exchanged. The plausible reason: those who hold that stock still see room in the previous direction and are in no hurry to part with it. This leans the reading toward a continuation pause rather than a reversal: control has not changed hands, price is simply reorganizing before continuing.
Footprint 2: relative development time
This is the most underrated footprint in all of Wyckoff reading. By logic, re-accumulations and re-distributions are pauses within a larger trend. That implies their development time should be proportionally smaller than that of the main structure that originated them. A compact re-accumulation that resolves quickly reinforces the reading that the dominant side keeps control.
In contrast, if the pause starts consuming a disproportionate amount of time, it is worth being alert: the more time a structure consumes that should in principle be a light pause to continue in the direction of the previous trend, the greater the probability that a change of control in the opposite direction is being built. Time, on its own, neither confirms nor invalidates — but combined with the rest of the footprints it provides a practical filter that many traders overlook.
Footprint 3: appearance of the schematic's characteristics
The third footprint consists of observing whether the structure, as it matures, leaves the typical traits of an accumulative or a distributive schematic. It is the operational translation of "no isolated trait validates, the strength is in the convergence": if the range shows the complete accumulative behavior pattern (range that calms down, bearish attempts that lose effectiveness, asymmetry in favor of the buying side), the accumulative hypothesis gains strength. If instead it shows the distributive pattern (agitated character, sustained high volume, asymmetry in favor of the selling side, spectacular bullish legs that are given back), the distributive hypothesis gains strength.
We have described both patterns in detail in the blocks on accumulation schematics and distribution schematics. The practical use here is to use them as a convergence filter: contrast what you see in your range with the typical traits of each side. If the majority points to one side, that is the most likely hypothesis.
The specific trap of the bearish side
In the bearish mirror (distinguishing between re-distribution and accumulation) there is an additional nuance worth keeping very present: the rallies within a re-distribution are usually intense, fast and emotionally convincing, precisely because there are many participants trapped in long positions who need to believe that "it has already bottomed". That hope activates the "buy cheap" bias and attracts buying that provides the counterparty the seller side needs to keep distributing. They are rallies aggressive in speed but poor in quality: they are not built with stable structure and, above all, they fail to hold — they lose everything gained at the same speed. This psychological trap has no clean symmetrical equivalent in re-accumulations, and is responsible for many premature long entries within bearish trends.
Final validation: what happens outside the range
No isolated footprint confirms a reading. The label — re-accumulation or distribution, re-distribution or accumulation — is validated only by the price behavior outside the range: continuity, acceptance of the new levels, proportional corrections, absence of re-entry. If price exits in the expected direction and stays outside with continuity, the reading was correct. If it re-enters the range and loses its control zones, the scenario changes and it is time to re-evaluate.
The practical takeaway: your job is not to label fast. Your job is to read the sequence — start of the range, relative time, appearance of the typical characteristics and continuity after the breakout — and let that sequence tell you which process is more likely. The label is a consequence of the reading, not a starting point.
Advanced Wyckoff Course + Volume Profile
One-time payment · Lifetime access
- +90 videos (+10h of content)
- Includes the Volume Profile course
- +50h of live session recordings
Trading zones and entry triggers
The methodology does not stop at analysis: it tells you where to act and how to enter. A trading zone is an area of the chart where the Wyckoff context suggests a high probability that price will react in a specific direction. An entry trigger is the price behavior that confirms that reaction and fires the position. Without a zone, the trigger is noise; without a trigger, the zone is just expectation.
The 3 main trading zones
The three trading zones on a real accumulation schematic. Zone 1 (Phase C): shakeout and test · Zone 2 (Phase D): test after breakout (LPS/BUEC) · Zone 3 (Phase E): test in trend. In distribution, mirrored.
1. Shakeout and test after shakeout (Phase C) — the best zone
It is the moment in the market with the best risk/reward ratio. There are two possible entries, and both are valid depending on the trader's profile:
- Direct entry on the shakeout (Spring / UTAD): as soon as price breaks the extreme of the range and re-enters with rejection, you trade the shakeout itself. It is the most aggressive entry and the one with the best price — you are right at the extreme, where the Stop Loss is tightest and the run to the other extreme of the range is maximum. It has a higher risk of failure because confirmation has not arrived, so it is reserved for Springs/UTAD with a clean reading (especially the low-volume Spring #3, where the very absence of volume confirms).
- Test after the shakeout: known as the Spring test (bearish shakeout) or the Upthrust test (bullish shakeout). You enter when price returns to test the shakeout zone with narrow ranges and low volume, confirming that the opposing pressure has disappeared. You give up some run and price relative to the direct entry, but you gain confirmation. It is the zone that more experienced Wyckoff traders wait for and the default choice when seeking maximum reliability.
2. Test after breakout (Phase D)
Price has already developed SOS/SOW and pulls back to test the broken level from outside (LPS/LPSY/BUEC). What you evaluate is whether the breakout is valid or whether it will be a false breakout. The risk/reward ratio is not as generous as in the shakeout, but it is still a first-class opportunity: if the analysis is correct, price will develop the full effect of the cause built during the range. It was Wyckoff's favorite position.
3. Test in trend (Phase E)
Price moves in trend outside the range. If the trend is very fast, it will take time to stop and develop a new schematic in favor of that direction — small re-accumulations (bullish) or re-distributions (bearish). The test offers the opportunity to join the already consolidated move, with the advantage that the dominant direction is clear and the risk is bounded to the test level itself.
Entry triggers: the footprint of intent
Reaching the zone is not enough. Before sending the order you need a signal that the professional side is acting: the trigger. The principle that governs it is reactive, not predictive — every market action must be confirmed or rejected by the subsequent price action. You do not enter anticipating the shakeout; you enter when price is already showing the expected intent. You give up some price in exchange for a much higher probability of success.
What gives away that intent? An intention candle, which shows the control of the side in favor of the reversal in two ways: rejecting the level with a long wick (a pinbar or hammer that leaves the footprint of absorption) or pushing with a wide body that closes near the extreme (at the highs for a buy, at the lows for a sell), a miniature Sign of Strength —or of Weakness—. In both cases volume accompanies it. From there, the trigger admits four formats according to how much confirmation you demand.
The four trigger formats over a support (on a sell they are symmetrical over a resistance): 1-candle pinbar, 2-candle engulfing, 3-candle star and fast trap schematic.
1-candle trigger — the fastest
The classic pinbar or hammer: a long wick penetrates the level and price rejects it forcefully, closing at the opposite extreme (near the high in a buy). That wick is the footprint of absorption condensed into a single candle. It is the earliest trigger and the one with the best price, but the one that provides the least confirmation — suitable when the zone and the context are very clear.
2-candle trigger — continuation confirmation
The classic engulfing pattern: a first small candle is followed by a second that engulfs its body and closes above the high of the first (in a buy) or below its low (in a sell). That continuation confirms that the imbalance has follow-through and was not an isolated impulse. You give up one candle of run in exchange for reliability.
3-candle trigger — exhaustion pattern
Reversal sequence at the extreme: a first candle in the direction of the previous trend, a second of indecision (doji or very narrow range) that marks the exhaustion, and a third confirming one in the opposite direction. It is the ideal trigger for precise reversals over a support or resistance.
Fast-schematic trigger — a reversal within the reversal
At the very point of the shakeout or the test, a small accumulation or distribution of a few candles forms, with its own miniature Spring or Upthrust. The entry comes after the breakout of that minor schematic. It is the fractal version of the fast reversal schematics, applied to the lower timeframe to fine-tune the exact moment.
The trigger can materialize in a single candle (the cleanest variant) or in a group of several that, together, show the same behavior. What matters is not the number of candles, but the aggregate result: did the intent of the side you were expecting appear, or not? And a critical nuance: the trigger is never an isolated buy or sell signal. It is the confirmation tool within a previously analyzed context; outside a valid trading zone, that same candle means nothing.
When the zone is a test: the other side of the trigger
In the test zones (Spring test, Upthrust test, LPS, LPSY) two complementary signals coexist. The trigger confirms that the winning side pushes; the test confirms that the losing side has withdrawn. A successful test is recognized by its lack of interest:
- ·Corrective move, not impulsive.
- ·Narrow ranges relative to the previous candles.
- ·Low volume (in VSA: No Supply in a narrow-range bearish candle, No Demand in a bullish one). It is valid when it shows lower volume than the two previous candles.
- ·Ability to hold in the zone without re-entering the territory prior to the swept extreme.
The three trading zones on a real distribution schematic (mirror of accumulation) and, enlarged, the behavior of a test at the candle level: narrow-range rally with low volume (No Demand) that does not clear the level, followed by the bearish trigger.
The highest-quality entry combines both sides: a test zone that shows lack of interest from the opposing side plus an intention candle that confirms the push in favor.
Entry styles: aggressive vs conservative
Once the zone is identified and the trigger recognized, what remains is to decide at what exact moment you enter. There are two styles, and the choice depends on how much clarity the context offers you:
Aggressive
You enter in the trading zone itself, on the first trigger (at the very point of the Spring or the test). Better price, tighter Stop Loss and maximum potential run — but a higher risk of the stop being hit if the shakeout is not yet finished.
When: very clean structures, genuine shakeout and a fully aligned context.
Conservative
You wait for the first pullback after the initial confirmation impulse and enter there. Better risk/reward ratio and less probability of a premature stop — in exchange for the fact that, if price does not pull back, you may stay out.
When: there is ambiguity in the context or the shakeout is not perfectly clean.
In practice, many traders combine both: they open part of the position aggressively in the zone and add the rest on the first conservative pullback. This way they capture price and run without entirely giving up confirmation.
Position management
Entering is just the beginning. The entry itself already hides a decision that filters out failed signals —the type of order you execute it with— and, once inside, the analysis does not stop: you keep reading price and volume with the same Wyckoff principles, now from the perspective of an open position. Management then rests on three decisions — where you place the Stop Loss, how much you risk and where you take profits — and on an attitude: price rules, continuity validates and the loss of structure invalidates.
The order type: the Stop order as the last filter
Once the trigger appears, the cleanest way to enter is to wait for the intention candle to break its extreme. To automate it you leave a Buy Stop order (on a buy) above the high of that candle, or a Sell Stop (on a sell) below its low: if price breaks the level, the order activates on its own; if it does not break it, you do not enter.
This is not an execution detail: it is the last check of your trading plan. All the previous analysis —context, structure, trading zone, trigger— builds the idea; the Stop order confirms it by demanding that price rotates in your favor and shows continuity in the move before risking a single euro. If that continuity does not appear, the trade never opens and you save yourself a failed signal. Triggering the Stop order is, literally, the difference between an idea on paper and an idea that the market is already validating with facts.
That is why the other two ways to enter are inadvisable:
✗ Market order
It adds nothing in exchange for considerable risk. Most of the time you would enter at a price practically identical to the Stop order, so you do not improve the entry; but by skipping the confirmation filter you also end up trading every signal that never breaks the extreme or rotates in your favor. Result: many more unnecessary Stop Losses.
✗ Limit order
It is the riskiest of all. Placing a Limit order is betting that price will turn exactly at a specific point, and that is impossible to know: we can never know in advance what price will do. Entering this way is not trading with confirmation, it is trading with expectation — it is, plainly, gambling.
Stop Loss: where the idea is invalidated
The Stop Loss is placed at the point where your trading idea is proven wrong. If price reaches there, it is not bad luck: the analysis was wrong. Depending on how much margin you want to give the scenario, there are three logical placements, from tightest to widest:
1. Trigger invalidation
At the opposite extreme of the intention candle that generated the entry. If price returns to that level, the confirmation has been voided. It is the tightest stop — useful in intraday trading or small structures.
2. Scenario invalidation — the most common
Beyond the extreme of the pattern that generated the entry: below the low of the Spring in a buy, above the high of the UTAD in a sell. It invalidates the specific event that triggered the trade. It is the default option in swing trading.
3. Structural (conservative)
On the other side of the entire complete structure. It is the widest stop and the one with the lowest probability of premature activation — in exchange, it forces you to reduce the position size to keep the same risk in monetary terms.
The Spring at the candle level: the shakeout pierces support and the bullish engulfing candle re-enters the structure. You enter with a Buy Stop above its high and draw the stop at one of three placements:
- 1 Below the bullish candle — the tightest.
- 2 Below the low of the Spring — the most common.
- 3 With extra margin — the most conservative.
The further the stop, the smaller the position size to risk the same.
And when a stop is hit, it is not just a loss: it is information. Depending on which entry event you traded, the stop activation tells you something different about what the informed money is doing:
| Entry | Where the Stop Loss goes | If it is hit, the market tells you… |
|---|---|---|
| Spring / Spring Test | Below the low of the Spring | The shakeout did not exhaust supply: there are still sellers in control and the accumulation was not ready. |
| UTAD / Upthrust Test | Above the high of the UTAD | The shakeout did not exhaust demand: buyers are still in command and the distribution was not ready. |
| LPS / BUEC | Below the broken resistance level | The bullish breakout was false: price re-enters the range and the strength is not confirmed. |
| LPSY | Above the broken support level | The bearish breakout was false: the range regains control and the weakness is not confirmed. |
Position size: risk defines the size
The rule is counterintuitive but non-negotiable: the Stop Loss determines the size, not the other way around. First you define where the stop goes according to the analysis; then you calculate how many units make that stop represent the percentage of risk you have decided to risk. Never the other way around — adjusting the stop so that the size you fancy "fits" is the fast track to ruin.
Position size
(Capital × % risk) ÷ (distance to Stop Loss × point value)
The percentage of risk is adjusted to the quality of the trade:
2%
High-quality trade: an unbeatable zone, aligned context, clean trigger.
1%
Standard-quality trade: good, but with some less defined nuance.
0.5%
Trade with doubts: minimal risk or, simply, do not trade.
Take Profit: target projection and management by zones
The law of cause and effect tells you that a relevant trend movement (effect) requires a proportional prior preparation in the form of a range (cause). Classic Wyckoff estimates that effect with Point & Figure counts. It is a valid tool, but with an underlying limitation: the effect of the cause cannot be known in advance with sufficient precision. The variables that determine it —development time and, above all, total volume traded— only offer an estimate.
That is why the modern proposal is not to predict a rigid target, but to map the zones that can stop or turn price and manage the position when it gets there. The practical sequence is:
- Identify relevant zones in advance: opposite structures, supply/demand zones and liquidity areas that already produced reversals on higher timeframes. Rank them: first the closest, then the structural extremes, finally those of larger timeframes.
- Define the management at each zone: at a minimum, protect the position; ideally, take partials or full profits according to the reaction.
- Demand a price response: if it goes through the zone with acceptance and continuity, you keep the scenario; if rejection, lack of continuity or re-entry appears, you reduce risk or close.
Where to place the Take Profit specifically? The usual references, in order of use:
- Liquidity zone (pivot): the next relevant high in a buy, the next low in a sell. It is the most frequent option — those pivots accumulate orders that stop price.
- Opposite structure: the next structure of the opposite type in the direction of the move — a distribution above if you bought after a Spring.
- Climactic action: at new highs or lows without historical references, you look for exhaustion signals (climactic volume, long wicks, volatility without progress, divergences) to close or reduce.
Partials and breakeven: a balanced management closes half the position at the first liquidity zone and lets the rest run with the stop moved to breakeven (entry point). A simple rule to protect yourself: when price covers 50% of the way to the target, move the stop to breakeven. From there, the trade can no longer be a loser.
After exiting the accumulation range, the position seeks profits in two zones, from the closest to the furthest:
- TP1 Liquidity zone: the resistance of the range itself, the first pivot that stops price. You close half the position and move the stop to breakeven.
- TP2 Opposite structure: a prior distribution above, which acts as a supply zone. You let the rest of the position run up to there.
Dynamic management: price rules
A trading zone is not a blind exit order: it is a mandatory observation point. If on arrival rejection and loss of continuity appear, the management must be defensive. If acceptance and continuity appear, it can be more permissive. These are the signals that force you to close or adjust ahead of time:
- ⚠Unexpected climactic volume against you in a critical zone.
- ⚠Shakeout in the opposite direction (an Upthrust if you are long, a Spring if you are short).
- ⚠Price does not advance for a long time: it loses momentum without apparent reason.
- ⚠A new structure against you appears, contradicting the context you entered with.
Separate bias from management. Reading the probable direction is one thing and protecting capital when price reaches a critical zone is another. You can hold a bullish bias and still unload part of the position when touching an important supply zone. With this read-and-respond approach, cause and effect stops being a promise of run and becomes an adaptable action plan.
Your Wyckoff trading plan: the 5 steps
All the previous theory is only worth it if you turn it into a repeatable process. This is the trading plan I follow and teach in the Advanced Wyckoff Course, condensed into five chained steps: from the long-term context to managing the already open trade. Each step answers one question and delivers a result that feeds the next.
General context · long term
Goal: define the bias — buy or sell?
- •Open a clean daily or weekly chart (price and volume only) and identify the latest sideways ranges: accumulations and distributions.
- •Above an accumulation, bullish bias (only buys); below a distribution, bearish bias (only sells); within the range, neutral.
- •The bias is set by the position of the current price relative to that most recent range.
Result: a clear bias. You will only look for trades in that direction.
Market situation · short term
Goal: what is the market doing now? Your immediate roadmap.
- •Identify the current phase (A-E) and the last operational event: Spring, Upthrust, SOS, SOW or breakout.
- •The last shakeout is the one that should bias you. Verify that it is aligned with the long-term context: context rules.
- •Check the effort-result relationship and that the price dynamic (its channel) remains intact.
Result: a clear roadmap and the type of strategy defined.
Trading zones
Goal: where will you wait for price?
- •Mark valid liquidity zones: pivots aligned with the trend, drawn with the wick extreme (not the body).
- •Do not pick a single level: lay out several and let the market choose which one it respects.
- •Prioritize the confluences (liquidity + channel extreme + Volume Profile level). More confluence, more confidence, more size.
Result: your trading zones marked, ordered by confluence.
Scenario planning
Goal: how will price reach your zone and what signal to expect?
- •Lay out a single move forward, never more, conditionally: "if price does X, I will do Y". Always prepare an alternative scenario.
- •Evaluate the nature of the arrival move: corrective (low volume, slow) activates the scenario; impulsive (high volume, fast) puts it on hold until you see exhaustion.
- •In Phase B (building cause) do not lay out long-term scenarios.
Result: a main scenario and its alternative, with the entry signal defined.
Position management
Goal: how much do you risk, where do you enter and where do you exit?
- •Before entering, confirm the minimum inputs: context, roadmap, zone, scenario with alternative and confirmed trigger.
- •Calculate the size with (Capital × % risk) ÷ (distance to Stop Loss × point value). The structure defines the ratio, never the other way around.
- •Once inside, keep the analysis active: at 50% of the run move the stop to breakeven, take partials at the first target and, if a shakeout against you appears, evaluate closing.
Result: a trade with controlled risk and managed to the end.
Advanced trading tip
The most common mistake of beginner Wyckoff traders is wanting to trade every structure they see. Not all accumulations are equal. Look for those with clear events, significant volume at the Climaxes, and a favorable context on a higher timeframe. The quality of the structure matters more than the number of trades.

Wyckoff Screener
14 days freeShortcut for step 1
The Wyckoff Screener scans thousands of assets in real time and automatically detects the ranges and the key events of the method.
All the effort/result analysis gets sharper with real tick data: per-bar delta, footprint, exact volume per price. I do it in NinjaTrader.
Affiliate link · paid partnership with NinjaTrader · #ad #NinjaTraderPartner
What makes it different from other methods?
The real underlying logic
It is the cornerstone of the methodology, what makes it stand above any other form of technical analysis; and it is that it is the only one that informs us about what is really happening in the market in a logical way through its three fundamental laws.
Universality
Another of its main strengths is that the reading is applicable:
- To any financial market with the only requirement that it has sufficient liquidity.
- On any timeframe. Whether you decide to do Day Trading or long-term investing, the operational principles are exactly the same.
Wyckoff vs classic methods
Many traders wonder how Wyckoff differs from traditional technical analysis. The key is that Wyckoff does not look for patterns in a vacuum, but rather analyzes the institutional logic behind each move:
Wyckoff vs Elliott Wave
While Elliott Wave focuses on counting waves and mathematical projections based on Fibonacci, Wyckoff analyzes why price moves. Elliott can tell you that you are in wave 3, but Wyckoff explains that the institutions are accumulating and why you should buy now. You do not need to count waves or debate whether it is an ABC correction or an impulsive 12345.
Wyckoff vs Classic Technical Analysis (chart patterns and support/resistance)
Chart-pattern analysis identifies geometric figures (triangles, flags, head and shoulders) and static support and resistance levels to anticipate moves. But a figure does not tell you why it forms, only that it is forming. Wyckoff explains the what, the how and the why: a "head and shoulders" is, for Wyckoff, a distribution, and you understand the institutional intent behind it. Support and resistance are still useful, but without Wyckoff context you do not know whether a resistance will break, will hold or is being swept to capture liquidity.
Wyckoff vs Indicators
Classic indicators (RSI, MACD, moving averages, stochastic) are by definition reactive: they derive from past price and always lag. They will tell you that an asset is overbought, but not whether the institutions are distributing or just in a technical pause before continuing up. Wyckoff works with primary data — price and volume read directly — and provides the context no indicator can give: which phase of the institutional cycle we are in.
The great advantage of the Wyckoff Method is that it can be combined with other methods. Many professional traders use Wyckoff as the general context and then apply Volume Profile for entry zones, or Order Flow for precise timing. Wyckoff is not exclusive; it is the logical foundation on which to build your trading.
Wyckoff vs SMC, CRT and Volume Profile: Which one to use?
If you have been trading for a while, you will have seen that SMC (Smart Money Concepts), CRT (Candle Range Theory) and Volume Profile dominate social media. The right question is not which is better, but for which timeframe and which trader profile each one serves. Wyckoff is the macro framework; the others are tactics that fit within it.
| Feature | Wyckoff | SMC | CRT | Volume Profile |
|---|---|---|---|---|
| Ideal timeframe | H4 - Daily - Weekly | M5 - H1 | M1 - M15 | H1 - Daily |
| Main focus | Price + Volume + Structure | Pure price action | Individual candles | Volume distribution |
| Learning curve | Long (3-6 months) | Medium (4-8 weeks) | Short (2-4 weeks) | Medium (4-6 weeks) |
| Key concepts | 3 laws, 5 phases, characteristic events | Order Blocks, FVG, BOS/CHoCH | AMD, liquidity, manipulation | POC, VAH, VAL, HVN, LVN |
| Best for | Swing and position trading | Day trading / prop firms | Scalping | Day and swing |
| Requires real volume | Yes (critical) | No | No | Yes (critical) |
| Provides macro context | ✓ Yes, which phase of the cycle we are in | No, requires another methodology | No, trades candle by candle | Partial (value zones) |
The optimal strategy: Wyckoff as the framework, the others as tactics
The best approach I see in consistent traders is not to choose one methodology, but to use Wyckoff for the context and SMC/CRT/Volume Profile for the execution:
- Macro framework (Wyckoff): on a daily or H4 chart, you identify whether we are in accumulation, distribution or trend.
- Trading zone (Volume Profile): you define POC, VAH and VAL to locate high-probability zones.
- Execution (SMC or CRT): you drop to M15-H1 and look for Order Blocks or CRT setups that align with the identified Wyckoff phase.
Conclusion: the SMC or CRT trader who ignores Wyckoff trades blind to the macro context and ends up making perfect setups in the wrong direction. The Wyckoff trader who ignores SMC/CRT loses precision on the entry. Learning the pillar first (Wyckoff) and then specializing in an intraday tactic is the most efficient path.
The 5 fatal mistakes of the Wyckoff trader
I have reviewed the accounts of hundreds of Wyckoff traders and the reality is that many know the characteristic events perfectly (Spring, SOS, LPS, UTAD) but are not profitable. The problem is almost never theoretical — it is about execution and attitude toward the chart. These are the five mistakes that destroy the most accounts.
Labeling and mapping out the schematic's development in advance
Drawing the complete schematic when the market has not yet left enough footprints to assess who is in control. For example, if the market is in Phase B, it is madness to confidently claim it is accumulation or distribution: at that point the cause is still being built, and at least until we see the shakeout in Phase C we cannot give greater probability to one scenario or the other. Labeling too early ties you emotionally to a hypothesis and blinds you to the information that comes afterwards.
→ Solution: work with open hypotheses while the structure has not left the necessary footprints. The label is a consequence of the reading, not a starting point. If you are in Phase B, your job is to observe and let the shakeout appear.
Trading against the context
Wanting to buy when you have a distribution above, or wanting to sell when you have an accumulation below. Fatal mistake. Where price is relative to the last range determines the context and, with it, what you should be looking for. If the last relevant structure is accumulative, your bias is buyer and you should look for Springs in corrective pauses. If it is distributive, your bias is seller and you should look for Upthrust in rallies. Fighting the context is trading against whoever controls the asset.
→ Solution: before looking for any entry, define which context you are in. You should only want to trade in favor of the context: Springs after having seen accumulation, Upthrust after seeing distribution. If the setup goes against the context, discard it even if "you like the chart".
Trading with limit orders
Seeing the extremes of the range and leaving a limit order "betting" that price is going to do a shakeout at some extreme is madness. We cannot know in advance whether price will reach that zone, nor whether on reaching it it will revert or continue in that direction. Trading with limit orders assuming, believing or betting that one thing will happen instead of the opposite is gambling, not trading. The same applies to betting that a breakout will be effective: placing a buy stop at resistance betting that price will keep rising. Madness. In both cases you delegate the decision to an expectation, not to what the market is showing at that moment.
→ Solution: always trade with real-time confirmation. Wait for price to reach the zone, observe how it behaves (rejection, volume, speed of reaction) and enter only when the footprint occurs. The difference between gambling and trading is exactly that: one is decided by hope, the other by confirmation.
Failing to adapt to new information or to have alternative scenarios
Flexibility is vital. The market can change from one moment to the next and we must have enough mental flexibility to identify that shift in sentiment as objectively as possible and trade in its favor. Dying with the initial scenario is a huge mistake. We may see a potential Spring with bullish development, price reaching the highs of the range, and we should not bet that the Spring's capacity will prevail and the market will keep rising: the breakout could perfectly well fail, turn into an Upthrust and generate a bearish move. This must be read in real time, not denied because "I had laid out longs".
For that adaptation to be possible, there is a prior step: having laid out from the beginning alternative scenarios in both directions, with their trading zones and invalidations. If you only have one scenario in mind, when the market moves the other way you will react late — or worse, you will refuse to recognize that your only plan has been invalidated.
→ Solution: before the session, lay out at least two bullish and two bearish scenarios with their levels. Treat each hypothesis as provisional: if the information demands it, switch scenarios without hesitation. The Wyckoff trader's strength is not in nailing the initial scenario, but in reacting quickly when the market tells them they were wrong.
Waiting for "perfect" textbook structures
The schematics you see in books are the ideal ones: PS-SC-AR-ST-Spring-Test-SOS-LPS chained cleanly. In practice, most real ranges are incomplete or "aborted" structures: the Spring does not appear, a clear test is missing, the SOS is ambiguous or Phase B drags on forever. If you only trade textbook structures, you will miss most of the game — and, worse, you will force yourself to "see" events that are not there to fit the chart with what you studied.
→ Solution: trade with probabilities on imperfect structures. When the reading is not 10/10, lower the size and demand a better risk/reward ratio instead of discarding the trade. The Wyckoff trader's real skill is in distinguishing what is missing and what can be compensated, not in waiting for the textbook schematic that only appears once a year.
The common pattern across the five mistakes is the same: wanting to impose a view on the market instead of reading what the market is showing. The profitable Wyckoff trader does not guess or gamble — they observe, contrast, wait for confirmation and, above all, keep the mental flexibility to switch scenarios when the new information demands it.
Limitations of the Wyckoff Method and when NOT to apply it
Wyckoff is powerful, but it is not omnipotent. Any trader who tells you otherwise is selling you smoke. Knowing the limits of the methodology saves you frustrations, unnecessary losses and, above all, helps you know when to switch to a different tool.
When Wyckoff does NOT work well
1. Markets without reliable real volume
Wyckoff relies on volume as confirmation. The method performs better when you work with assets whose volume is centralized and represents real activity: futures (indices, commodities, bonds, currencies), stocks listed on regulated exchanges and liquid ETFs. In fragmented or OTC markets (pure spot forex, low-cap altcoins, synthetic derivatives), the volume you see only reflects a fraction of the total flow and can induce false readings of absorption or effort.
2. Macro events and high-impact news
When a Fed decision, an employment figure or geopolitical news moves the market, Wyckoff structures break because the catalyst is exogenous, not structural. An asset can be in a perfect Phase B and a central bank announcement nullifies all the cause built. Solution: do not open new positions just before high-impact events and consider reducing exposure.
3. Markets in a very strong trend without pauses
Wyckoff shines at identifying reversals and trend starts from ranges. In markets that have been rising or falling for months with very little consolidation (Bitcoin in a parabolic bull market, for example), complete structures are scarce. In these cases, continuation trading with pullbacks or Volume Profile is usually more profitable.
4. If your psychology cannot bear waiting
This is the most honest limitation. Wyckoff requires patience that most traders do not have: the highest-probability structures take time to complete, whether on a monthly, daily or minute chart. If you need to trade every day for dopamine or psychological pressure, you will struggle to follow the method even if you master the theory. The method applies from very low timeframes to high ones, but the discipline of waiting for the structure to complete is non-negotiable in any of them.
5. Assets correlated with a dominant market
There are assets whose behavior is not independent: most altcoins follow Bitcoin, sector ETFs move with the benchmark index, and many exotic currencies depend on the dollar. In these cases, a "perfect" Wyckoff structure in the subordinate asset can break simply because the dominant one does the opposite. The real cause is in the leading asset, not the follower. Always read the structure of the dominant one first and use it as context.
Legitimate criticisms you should be aware of
- •Post-hoc confirmation bias: Wyckoff events are easy to label by looking at an already-formed chart. In real time, identifying a Spring before the SOS is much harder than the courses sell.
- •Lack of public quantitative backtests: unlike mechanical strategies, Wyckoff is interpretive, which makes rigorous backtests difficult. This does not mean it does not work, but it does mean you cannot automate it objectively.
- •Requires experience reading volume: the principles are simple but their execution demands hundreds of hours watching charts. It is not a "plug and play" methodology.
- •Modern markets with greater HFT noise: high-frequency algorithmic trading has made some classic events (especially Springs) more erratic. The principles remain valid but intraday Springs are noisier than 30 years ago.
My honest recommendation: Wyckoff is the best methodology I know for traders with a swing/position horizon who want to understand why the market moves. But if what you need is a mechanical system, a scalping strategy or something you can execute in 10 minutes a day, it is not what you are looking for. And that is fine. Knowing the right tools for your profile is more important than mastering the "best" methodology.
If you are interested in the quantitative side — backtesting, validation with Walk Forward, Monte Carlo, professional metrics (Sharpe, Sortino, Calmar) — we have published a complete section: Algorithmic Trading. Wyckoff and algorithm are not exclusive: the institutional reading defines the macro bias and the system executes it without emotions.
Quick recap: key concepts of the Wyckoff Method
The Wyckoff acronyms are one of the highest entry barriers of the method. This is the quick reference to the terms that appear in this article and in any serious Wyckoff analysis. Save this section as a bookmark.
Laws
- Supply and Demand
- Price rises when demand exceeds supply and falls when supply exceeds demand. Universal principle on which the other two laws are built.
- Cause and Effect
- Every significant movement (effect) requires a proportional prior preparation (cause). More time and activity in the range → greater subsequent run.
- Effort vs Result
- Volume (effort) must be in harmony with the price displacement (result). Divergences between the two anticipate possible reversals.
Structures
- Accumulation
- Lateral range after a bearish trend in which the well-informed operators absorb supply to prepare a new bullish trend.
- Distribution
- Lateral range after a bullish trend in which the well-informed operators liquidate their long positions to prepare a bearish trend.
- Re-accumulation
- Lateral range within a bullish trend. Pause that reabsorbs supply before continuing up, not reversing the trend.
- Re-distribution
- Lateral range within a bearish trend. Pause that reabsorbs demand before continuing down.
Phases
- Phase A
- Stopping the previous trend. Events PS, SC, AR, ST.
- Phase B
- Building cause. Lateral range with decreasing volume. The longest.
- Phase C
- Final test: Spring (in accumulation) or UTAD (in distribution).
- Phase D
- Confirmation: SOS and LPS (bullish) or SOW and LPSY (bearish).
- Phase E
- Developed trend: bullish or bearish, now outside the range.
Accumulation events
- PS · Preliminary Support
- First significant support after a bearish trend. Increasing volume appears. Not yet the definitive floor.
- SC · Selling Climax
- Capitulation: explosive volume, wide bearish candle, fast recovery. Marks the provisional floor of the range.
- AR · Automatic Rally
- Automatic bounce after the SC due to selling exhaustion. Defines the initial top of the range.
- ST · Secondary Test
- Return to the SC zone with lower volume. Confirms the absence of selling pressure.
- Spring
- False breakout below the support of the range that captures stops and reverts quickly. Final shakeout.
- Test
- Return to the Spring zone with very low volume. Confirms that supply is absorbed.
- SOS · Sign of Strength
- Breakout of the top of the range (Creek) with high volume and wide candles. Sign of buying strength. Also called JAC (Jump Across the Creek).
- LPS · Last Point of Support
- Last support before the bullish trend, usually as a retest of the old resistance now turned into support (also called BUEC). The highest-probability trade entry.
Distribution events
- PSY · Preliminary Supply
- First significant supply after a bullish trend. Increasing volume. Not yet the top.
- BC · Buying Climax
- Buying capitulation: explosive volume, wide bullish candle, fast pullback. Provisional top.
- AR · Automatic Reaction
- Automatic fall after the BC. Defines the initial floor of the distribution range.
- ST · Secondary Test
- Return to the BC zone with lower volume. Confirms the absence of buying pressure.
- UT · Upthrust
- False breakout above resistance that captures buying stops and reverts. Minor shakeout.
- UTAD · Upthrust After Distribution
- Final shakeout above the highs of the range before the bearish trend. Bearish mirror of the Spring.
- Test
- Return to the UTAD zone with very low volume. Confirms that demand is absorbed.
- mSOW · minor Sign of Weakness
- First sign of weakness within the range. Fall with increasing volume.
- SOW · Sign of Weakness
- Breakout of the support of the range with high volume. Confirms the completed distribution.
- LPSY · Last Point of Supply
- Last top before the bearish trend. Highest-probability sell trade entry.
Advanced Wyckoff Course + Volume Profile
One-time payment · Lifetime access
- +90 videos (+10h of content)
- Includes the Volume Profile course
- +50h of live session recordings
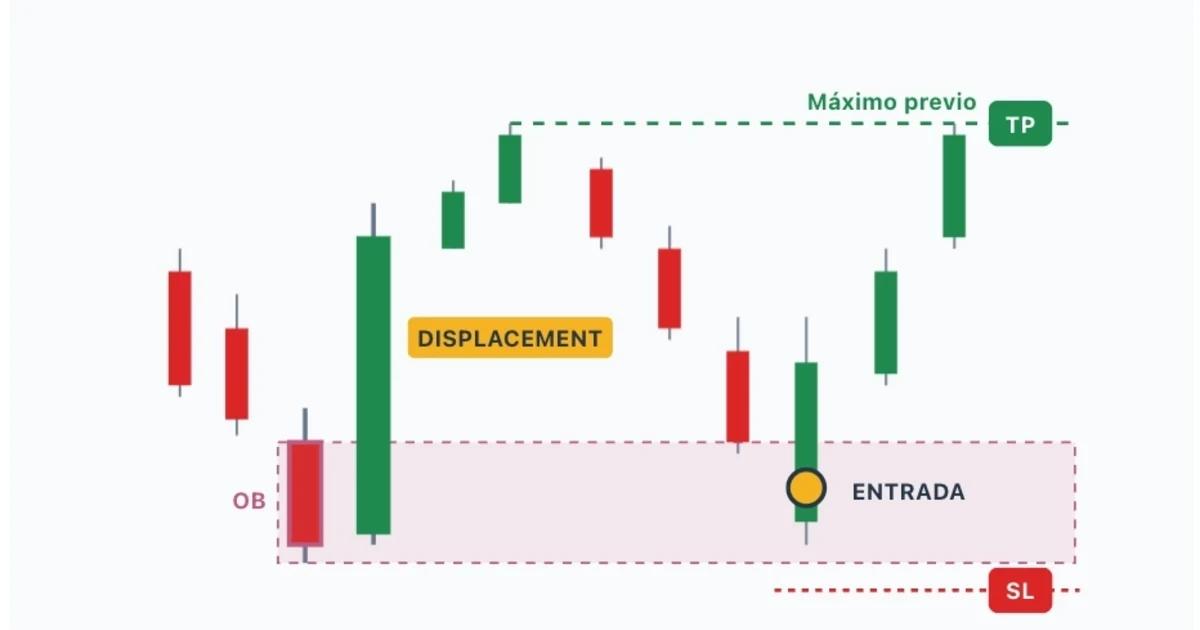
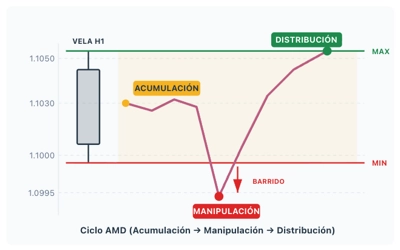
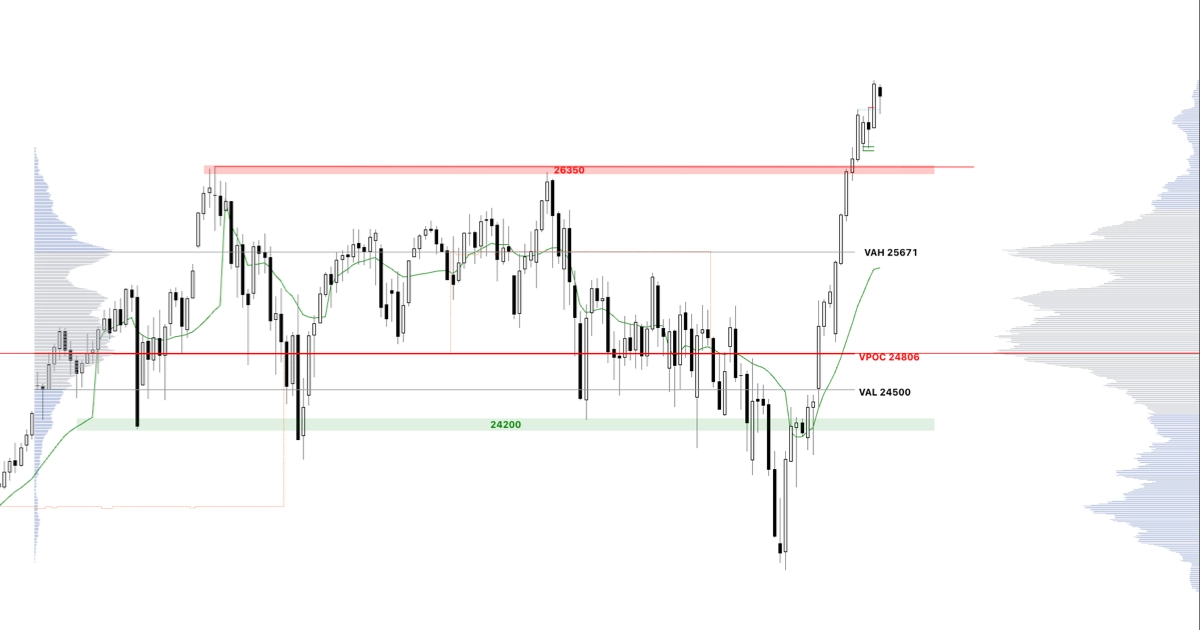
Frequently asked questions about the Wyckoff Method
What is the Wyckoff Method?
The Wyckoff Method is a technical analysis methodology developed by Richard Wyckoff in the early 20th century. It is based on the study of supply and demand in financial markets to identify the activity of "smart money" (large institutional operators) through the analysis of accumulation and distribution structures.
What are the 3 laws of the Wyckoff Method?
The three fundamental laws of Wyckoff are: 1) Law of Supply and Demand: price rises when demand exceeds supply and falls when the opposite occurs. 2) Law of Cause and Effect: every significant movement requires proportional prior preparation (cause). 3) Law of Effort vs Result: volume must be in harmony with price movement.
Who was Richard Wyckoff and why is he important?
Richard D. Wyckoff (1873-1934) was a legendary Wall Street trader, pioneer technical analyst and financial editor. He started as a stock broker at age 15, founded The Magazine of Wall Street (200,000 subscribers) and for decades interviewed operators such as Jesse Livermore and J.P. Morgan to decode their methods. He was the first to reveal that markets are controlled by institutional operators following repeatable patterns. His methodology (1931) laid the foundations for Volume Spread Analysis, Market Profile and Order Flow.
What is the Composite Operator?
The Composite Operator is a Wyckoff concept that represents all large institutional operators acting as a single entity. It includes banks, investment funds and market makers. Wyckoff analysis seeks to identify their footprints in the market to trade in the same direction.
What is accumulation in Wyckoff?
Accumulation is a process where institutions gradually buy an asset without raising the price, absorbing the floating supply. It is identified by a lateral range with characteristic events like the Selling Climax (SC), Automatic Rally (AR), Secondary Test (ST) and Spring. Upon completion, it leads to a bullish movement.
Does the Wyckoff Method work in cryptocurrencies?
Yes, the Wyckoff Method works in any liquid market, including cryptocurrencies. The principles of supply and demand are universal. Bitcoin and other cryptocurrencies with sufficient volume show the same accumulation and distribution structures as stocks, forex or futures.
What are the most common mistakes when trading Wyckoff?
The five most common mistakes are: 1) labeling the schematic in advance before the market leaves enough footprints; 2) trading against the context (buying with distribution above or selling with accumulation below); 3) trading with limit orders betting on anticipated shakeouts or breakouts instead of waiting for confirmation; 4) failing to adapt to new information or to have alternative scenarios laid out in both directions; 5) always waiting for "perfect" textbook structures when most real ranges are incomplete or aborted. The common pattern is wanting to impose a view on the market instead of reading what the market is showing. You have the full breakdown in the 5 fatal mistakes section.
Can Wyckoff be combined with SMC, CRT or Volume Profile?
Yes, and it is the most efficient approach. Use Wyckoff as the macro framework (on H4-Daily, identify whether we are in accumulation, distribution or trend), Volume Profile to locate trading zones (POC, VAH, VAL), and SMC or CRT on M15-H1 for the execution aligned with the Wyckoff phase. SMC and CRT are direct descendants of Wyckoff, so they are perfectly compatible.
What type of order should you use to enter with Wyckoff?
The cleanest way to enter is with a Stop order: a Buy Stop above the high of the intention candle (the trigger) for buys, or a Sell Stop below its low for sells. It acts as the last filter of the plan: it only activates if price breaks the extreme and shows continuity; if not, the trade never opens. The market order does not improve the price but skips that filter (more unnecessary Stop Losses) and the limit order is the riskiest because it bets that price turns at an exact point. In Wyckoff you trade with confirmation, not prediction. Detail in the Position management section.
What is the 5-step Wyckoff trading plan?
Five chained steps, from macro analysis to execution: 1) General context (long term): identify accumulations and distributions and define the bias. 2) Market situation (short term): current phase (A-E) and last event, aligned with the context. 3) Trading zones: mark liquidity zones with confluences. 4) Scenario planning: a single conditional move ("if X, then Y") with an alternative. 5) Position management: size according to risk, Stop order, Stop Loss and exit management. The first two read the market, the next two plan and the last executes. Breakdown in Your trading plan in 5 steps.
Where is the Stop Loss placed in the Wyckoff Method?
At the point where your idea is proven wrong. There are three logical placements, from tightest to widest: 1) Trigger invalidation: at the opposite extreme of the intention candle (the tightest, for intraday). 2) Scenario invalidation (the most common): beyond the pattern that triggered the entry — below the low of the Spring in a buy, above the high of the UTAD in a sell. 3) Structural (conservative): on the other side of the entire structure. The further the Stop Loss, the smaller the position size to risk the same. Detail in Position management.
Where to take profits (Take Profit) in Wyckoff?
At the liquidity zones and at the opposite structure, not at an arbitrary fixed ratio: the structure defines the target. In a buy from accumulation, TP1 is placed at the resistance of the range (the Creek), the first liquidity zone, where half the position is closed; TP2, at the opposite structure above (a prior distribution that acts as a supply zone), where the rest is closed. Management is dynamic: at ~50% of the run move the Stop Loss to breakeven and take partials. The projection relies on the Law of Cause and Effect: the more cause built, the greater the expected run.
How long does it take to master the Wyckoff Method?
From 6 to 18 months of active study for operational consistency. The theory is learned in 4-6 weeks, but real-time pattern recognition requires seeing hundreds of structures. Recommendation: 3 months labeling past structures on historical charts, 3 months on demo identifying in real time, and from month 6-9 scaling to live with conservative risk. Compared to SMC (4-8 weeks) or CRT (2-4 weeks), Wyckoff has a longer curve but a deeper understanding.
When is it NOT advisable to use the Wyckoff Method?
In five specific scenarios: 1) markets without reliable real volume (it is ideal to trade futures, stocks or ETFs on regulated exchanges with centralized volume); 2) around high-impact macro events; 3) markets in a parabolic trend without pauses; 4) if your psychology cannot bear waiting for the structure to complete; 5) assets highly correlated with a dominant market (the real cause is in the leader). Full detail in the Limitations section.
References and bibliography
Wyckoff, R.D. (1931). The Richard D. Wyckoff Method of Trading and Investing in Stocks: A Course of Instruction in Stock Market Science and Technique. Wyckoff Associates.
Wyckoff, R.D. (1910). Studies in Tape Reading. Burlington, VT: Fraser Publishing.
Pruden, H. (2007). The Three Skills of Top Trading: Behavioral Systems Building, Pattern Recognition, and Mental State Management. Wiley.
Williams, T. (1993). Master the Markets: Taking a Professional Approach to Trading & Investing Using Volume Spread Analysis. TradeGuider Systems.
Villahermosa, R. (2018). The Wyckoff Methodology in Depth: How to Trade Financial Markets Logically. Amazon KDP.
Villahermosa, R. (2020). Wyckoff 2.0: Structures, Volume Profile and Order Flow. Amazon KDP.
Last updated: June 2026